Sending a Campaign
Send a one-off email or SMS campaign to a list — your own content with personalization tags, or an AI agent writing each message — with follow-ups, scheduling, and consent handled for you.
Sending a Campaign
The campaign wizard sends one email or SMS campaign to a list of contacts. You choose the channel, decide whether you write the message yourself or an AI agent writes one per contact, pick the recipients, set a schedule, and launch. Behind the scenes the wizard compiles your choices into an orchestration, so everything you can do with an orchestration — pause it, read its log, drill into per-recipient outcomes — works for a campaign too.
The images on this page are illustrations of the screens, drawn to match the labels described; screenshots of the live product replace them as they are captured.
Use it when you have something specific to say to a known audience: a promotion, an event invitation, a re-engagement nudge, a follow-up to an import. For an ongoing, AI-driven outbound program, an Email Strategy is the better fit; the wizard can also send through one.
What You'll Need
- The
agents:mail:managepermission. The seeded Admin and Manager roles have it; Member and Viewer do not, and will not see the entry points below. - For email: a verified sending domain (Settings (the gear icon) → Channels → Email Sending) and a sender identity to send as (Settings → Channels → Notification Senders). Optional: a signature (Settings → Channels → Email Signatures).
- For SMS: a workspace phone number (Settings → Channels → Phone Numbers).
- If an agent writes the message: an existing Email Strategy or SMS Agent. The wizard links to the creation flow if you have none.
- An audience: a saved list, a spreadsheet, or a pasted set of addresses. Consent is respected automatically — see What happens after launch below.
Where to Start
The wizard lives at one place, reached from wherever you happen to be:
| You are… | Do this |
|---|---|
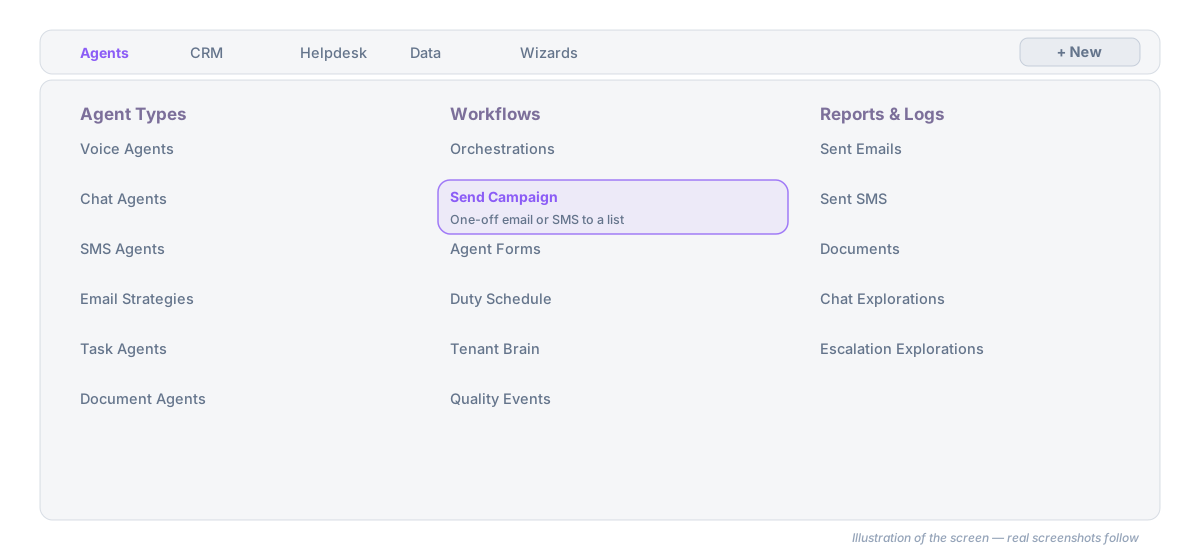
| Anywhere | Agents → Workflows → Send Campaign, or the + New button in the top bar → Campaign |
| On CRM → Records → Contacts or Leads with rows selected | Click Send campaign in the selection bar. You are asked for a list name; the selection is saved as a list and the wizard opens on it |
| On CRM → Daily work → Lists | Click the megaphone icon on a row (Send campaign to this list), or open the list and click Send Campaign in its header |
| Just finished an import | On the Import Complete screen, click Send a campaign to this list |
| On Agents → Workflows → Orchestrations with no workflows yet | Click Send a campaign in the empty state |
| Reading a finished campaign's Recipients tab | Click a cohort action such as Follow up with clickers — the cohort becomes a list and the wizard opens on it (see Reading Campaign Results) |
Arriving from a list pre-fills the Recipients step; you can still change it.
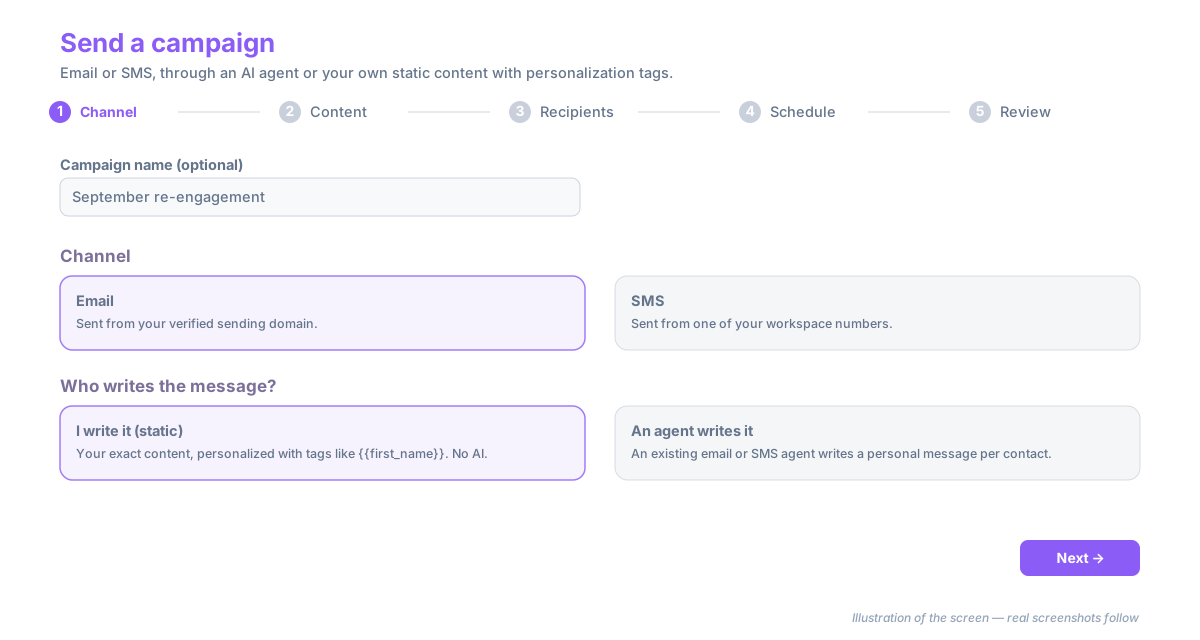
Step 1 — Channel
The page is titled Send a campaign and shows a five-step indicator: Channel · Content · Recipients · Schedule · Review.
- Optionally type a Campaign name. If you leave it blank, one is generated.
- Under Channel, pick Email (Sent from your verified sending domain) or SMS (Sent from one of your workspace numbers).
- Under Who writes the message?, pick one:
- I write it (static) — your exact content, personalized with tags like
{{first_name}}. No AI is involved; every recipient gets the same message with their own values filled in. - An agent writes it — an existing email or SMS agent generates a personal message per contact from its own instructions and the contact's CRM context.
- I write it (static) — your exact content, personalized with tags like
- Click Next.
Step 2 — Content
What you see depends on the choices in step 1.
If an agent writes it
- Under Pick the agent, choose the strategy (email) or SMS agent from the drop-down.
- Click Next. That is the whole step — the agent's own settings decide the sender, tone, and content.
If the list is empty, the wizard links to Create one with the mail wizard or Create an SMS agent first.
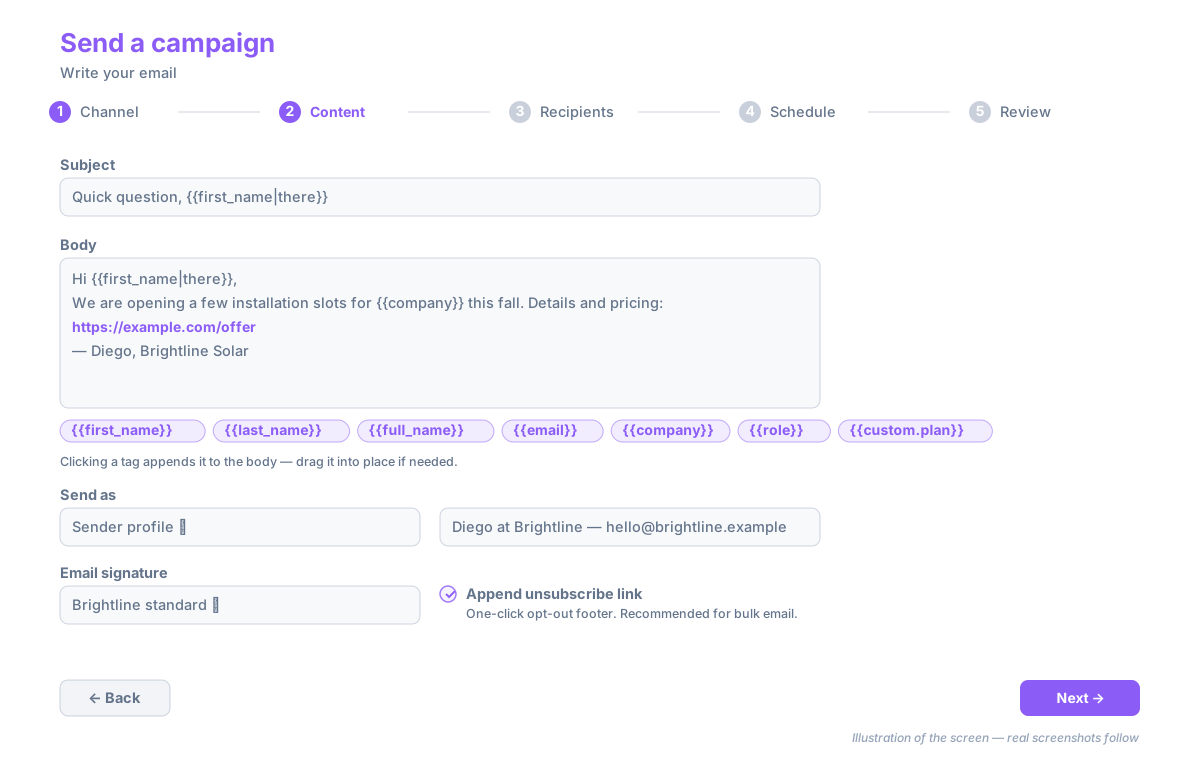
If you write an email
- Enter a Subject and write the Body in the rich-text editor. Both accept personalization tags.
- Click a tag chip to append it to the body, then drag it into place if needed.
- Under Send as, choose how the email is signed:
- Sender profile — pick one of your workspace's sender identities.
- A custom From name and From email on your verified domain.
- Use the identity of… an existing email strategy, to borrow its from-name and address.
- Optionally pick an Email signature.
- Leave Append unsubscribe link on (it is on by default). It adds a one-click opt-out footer and is recommended for bulk email. The link is plain text — no tracking code is visible in it.
- Click Next.
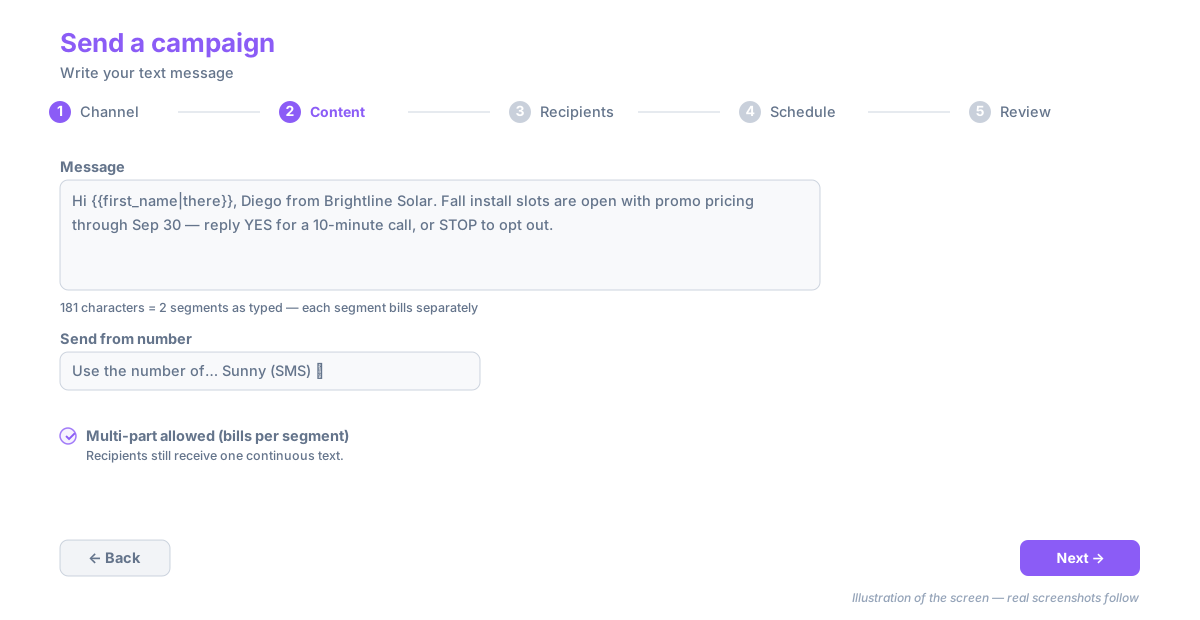
If you write an SMS
- Type the Message. Below it, a counter reads N characters = M segments as typed.
- Under Send from number, pick a workspace number, or Use the number of… an SMS agent.
- If the message runs to more than one segment, tick Multi-part allowed (bills per segment). Recipients still receive one continuous text — carriers stitch the parts together — but each segment is billed separately. Until you tick it, Next stays disabled for a multi-segment message.
- Click Next.
A message that could exceed 1,600 characters once tags are filled must be shortened; the wizard says so under the counter. Emoji or characters outside the basic GSM set switch the encoding, which drops the single-segment limit from 160 to 70 characters — the counter reflects this as you type.
Personalization tags
Tags work in the subject, body, message, and follow-ups. Add a fallback after a pipe for contacts missing the field: {{first_name|there}} renders "there" when there is no first name.
| Tag | Fills with |
|---|---|
{{first_name}}, {{last_name}}, {{full_name}} |
The contact's name fields |
{{email}}, {{phone}} |
Their email address or phone number |
{{company}}, {{role}} |
Company and role / title |
{{address}}, {{linkedin_id}}, {{years_experience}} |
Address, LinkedIn, years of experience |
{{custom.<field>}} |
Any custom contact field you have defined — one chip per field |
Plain URLs you type into an email body become clickable links whose visible text is the URL itself; clicks on them are tracked when email tracking is on.
Follow-ups (optional)
Add one or more follow-up messages that go out after a delay you set in days and hours, to contacts who have not responded. Each follow-up has its own subject and body (email) or message (SMS) and accepts the same tags. A follow-up is skipped for any contact who replied since the campaign started — see What happens after launch.
Step 3 — Recipients
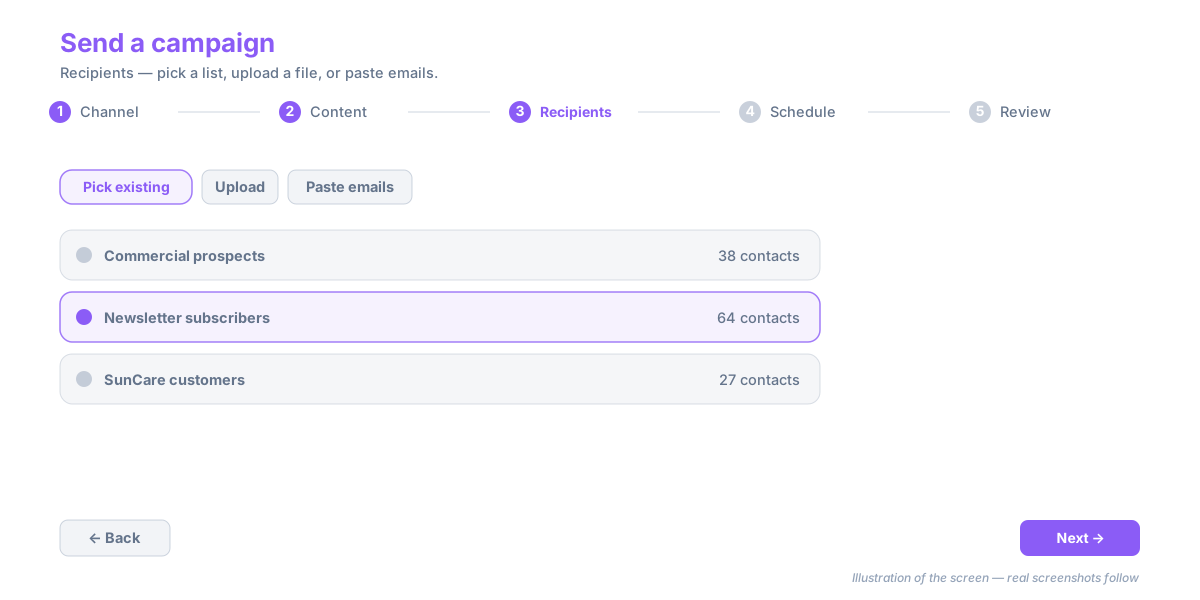
The step is headed Recipients — Pick a list, upload a file, or paste emails. Three tabs:
- Pick existing — choose a saved list. If you arrived from a list, it is already selected and its contact count is shown.
- Upload — click Click to select a .csv, .xlsx, or .xls file, optionally set a List name, and click Create list. The file becomes a new list.
- Paste emails — paste addresses separated by commas, spaces, or new lines (the count is detected as you type), optionally name the list, and click Create list.
Click Next once a list is selected.
Step 4 — Schedule
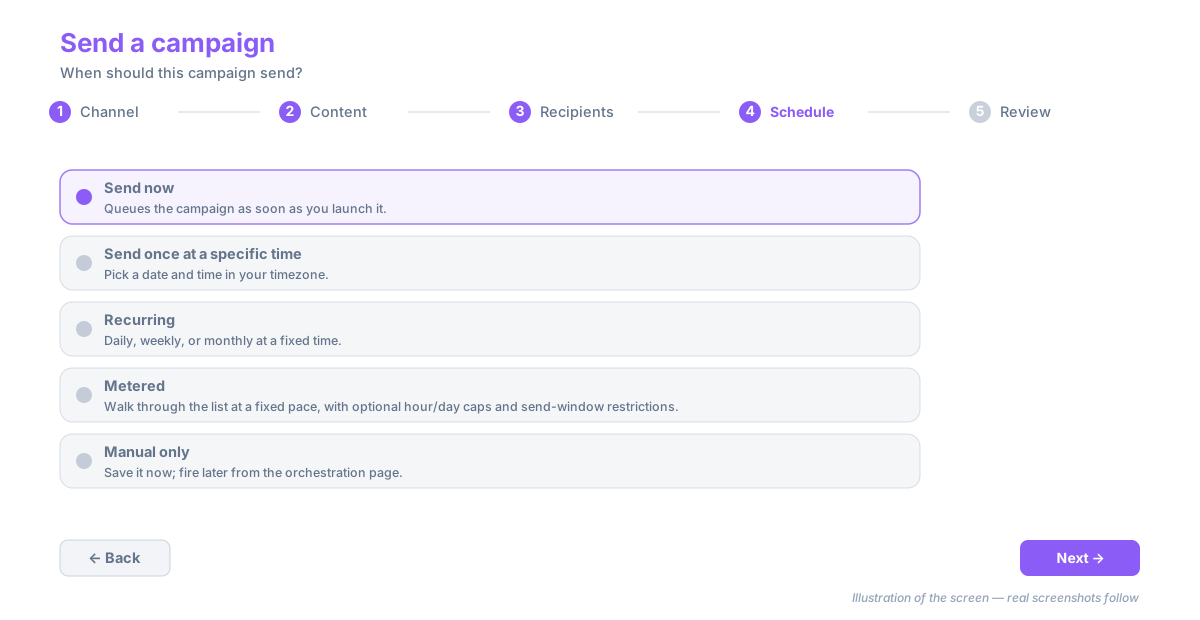
Under When should this campaign send? pick one:
| Option | What it does |
|---|---|
| Send now | Queues the campaign as soon as you launch it |
| Send once at a specific time | Pick a Date & time in your Timezone |
| Recurring | Daily, Weekly (choose Days of week), or Monthly (choose Day of month) at a Time of day |
| Metered | Walk through the list at a fixed pace, with optional hour/day caps and send-window restrictions |
| Manual only | Save it now; fire it later from the orchestration page |
Click Next.
Step 5 — Review and Launch
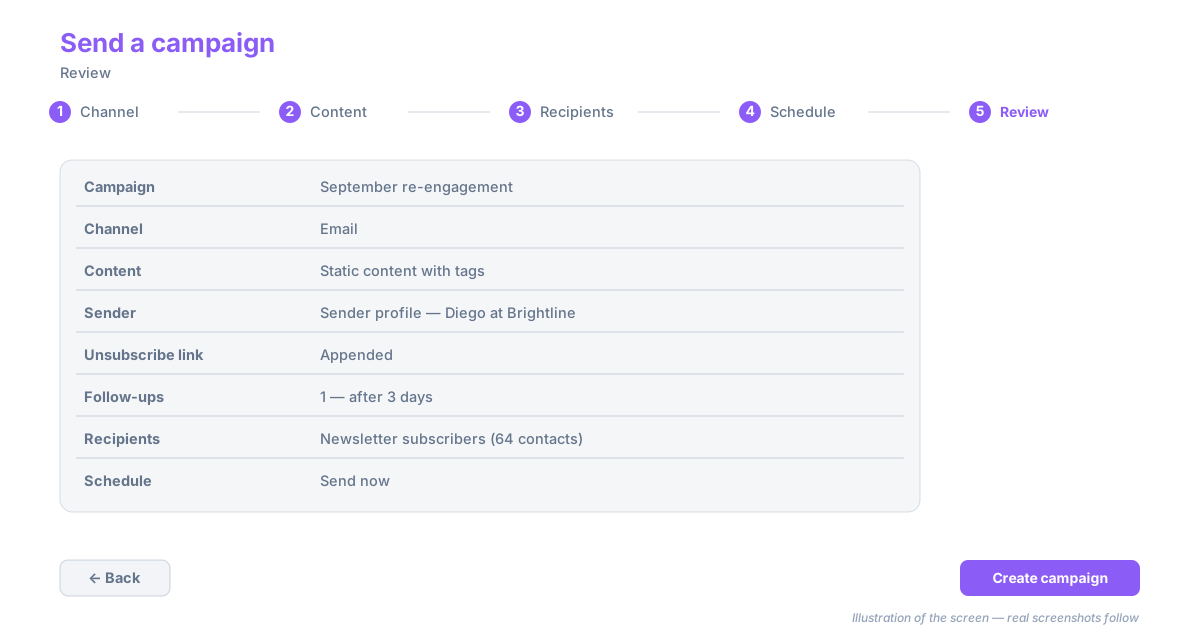
The Review step lists everything in one place: Campaign, Channel, Content (Static content with tags or AI agent writes each message), Sender, Unsubscribe link (Appended / Not appended), SMS length (Single segment / Multi-part allowed), Follow-ups, Recipients with the contact count, and Schedule. Use Back to change anything.
- Click Create campaign.
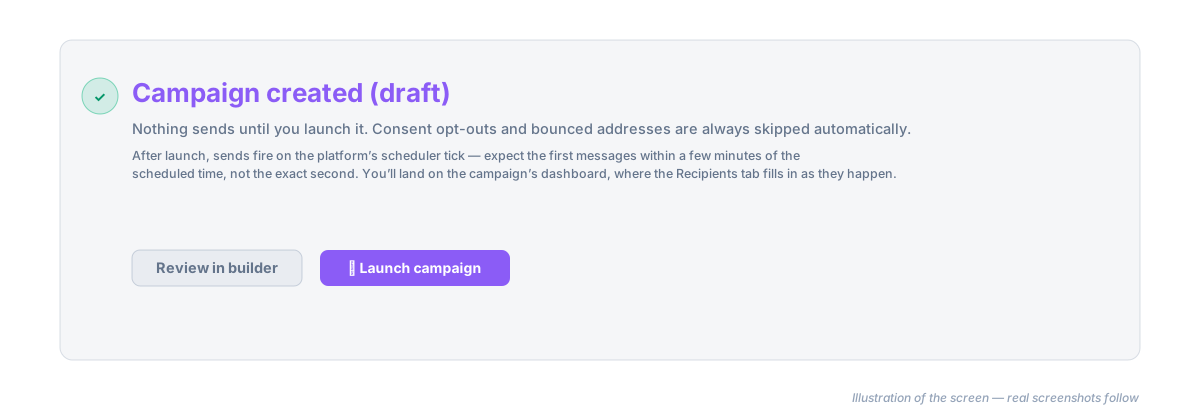
- The page changes to Campaign created (draft). Nothing has been sent yet.
- Either click Review in builder to inspect the compiled orchestration, or click Launch campaign.
- After launch you land on the campaign's dashboard with a green Campaign launched. banner and a link to the Recipients tab.
What Happens After Launch
- Sends fire on the platform's scheduler tick. Expect the first messages within a few minutes of the scheduled time, not the exact second. Large lists go out in batches across several ticks.
- Consent is enforced per contact at send time. Anyone who has opted out, and any address that has bounced, is skipped automatically and recorded as Suppressed on the Recipients tab with the reason. Consent does not travel with a list: a cohort built from a previous campaign drops opted-out contacts before the list is created, and the wizard tells you how many were excluded.
- A contact who replies drops out of the follow-up sequence. Any follow-up still pending for them is recorded as Skipped with the reason Contact responded since this campaign started.
- SMS is rate-limited per sending number so one campaign cannot get your number throttled by the carrier. The default pace is 0.8 messages per second per long-code number; a tenant admin can change it per number under Settings → Channels → Phone Numbers → (edit a number) → Campaign SMS rate (msgs/sec, optional). Carrier rate-limit responses are retried later rather than counted as failures.
- Every message is stored in full and linked back to the campaign, so the contact's Activity Timeline, the Sent Emails and Sent SMS reports, and the campaign's own Recipients tab all agree.
Troubleshooting
Next is disabled on the Content step. Something required is missing: an email needs a subject, a body with text, and a sender; an SMS needs a message and a sending number. A multi-segment SMS also needs Multi-part allowed ticked, and a message that could exceed 1,600 characters must be shortened. Follow-ups need a delay greater than zero and their own content.
"No lists yet. Try uploading or pasting." Your workspace has no saved lists. Use the Upload or Paste emails tab, or import one first — see Importing Data.
Most recipients show as Suppressed. Check the reason in the row's Detail column. Opted-out and bounced contacts are skipped by design; if the whole list is suppressed, the list was probably built from contacts who unsubscribed from an earlier campaign.
An SMS row shows Skipped with a segment reason. The rendered message for that contact — after tags were filled — was longer than the campaign allows. Either enable multi-part or shorten the message and tag fallbacks.
Next Steps
- Reading Campaign Results — the Recipients tab, engagement states, and turning a cohort into the next campaign.
- Lists — build and maintain the audiences you send to.
- Building Workflows — when a campaign needs branching, waits, or other agents, edit the compiled orchestration in the builder.