Set up document branding
Save logos, colors, headers and footers, then choose tenant or agent branding for new documents.
Set up document branding
Save a logo, colors and repeating header/footer so generated documents use a consistent style. Branding profiles can be shared across documents, with an agent-specific choice when needed.
Before you begin
You need permission to manage document settings. Agent setup also needs permission to manage document agents. Existing document versions keep the branding saved when they were created; changing a profile does not restyle them.
Create or edit a branding profile
- Open Documents → Branding & policy. You can also open Document Branding & Signing Policies in Settings.
- In Branding, select a profile or add a new one.
- Enter its Profile name and choose the Brand color and Font.
- Optionally choose a PNG or JPEG Logo.
- Edit Header and Footer, then choose Paper size.
- Check the illustrative preview and select Save settings.
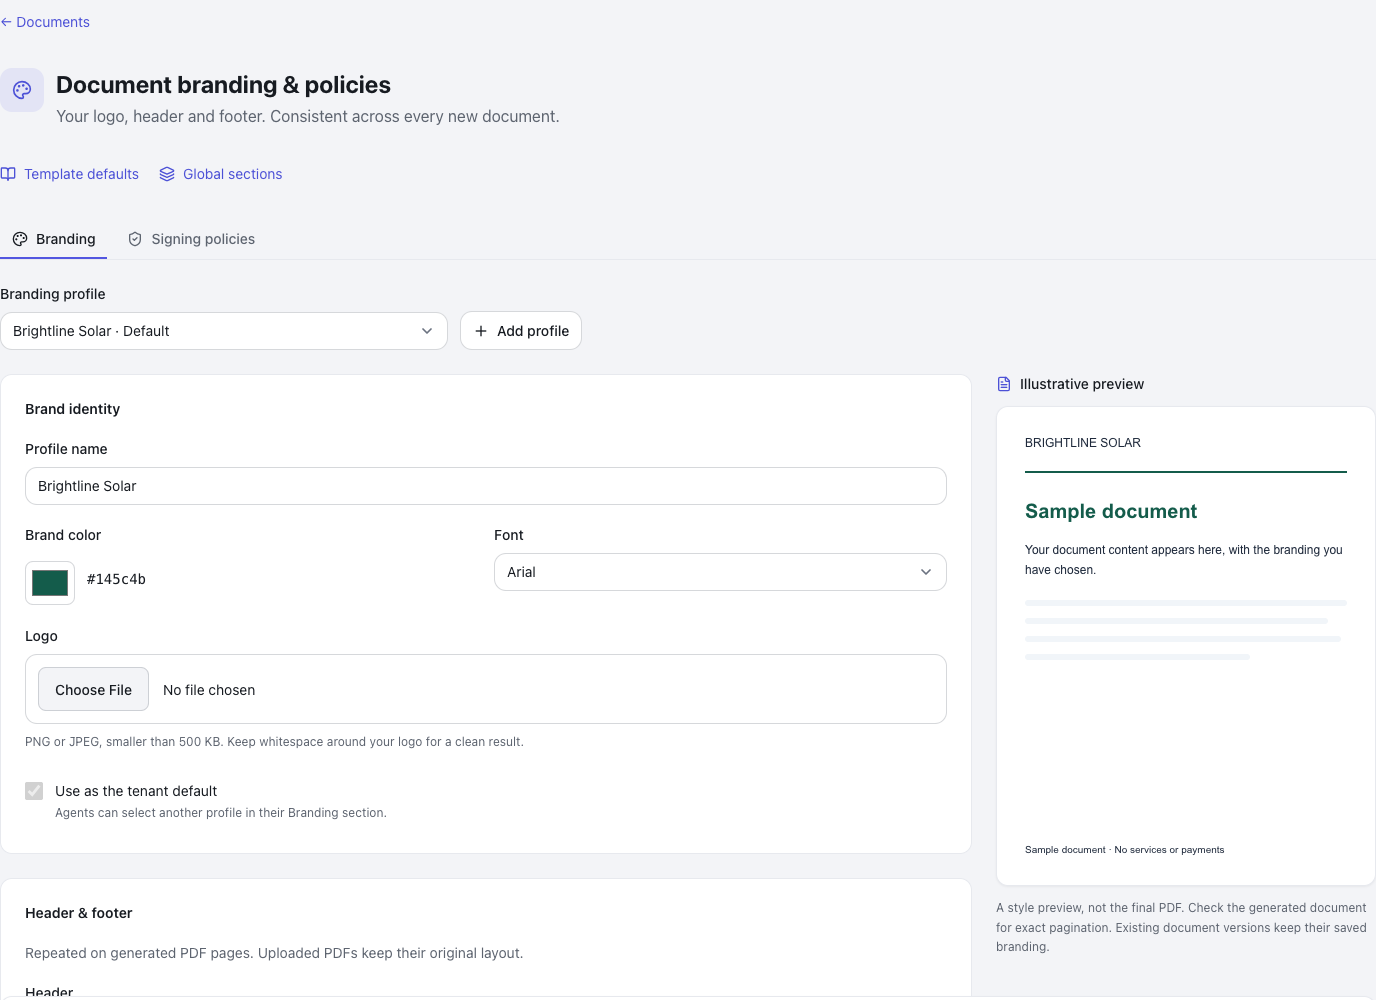
The preview shows the intended style. Check an actual generated PDF for exact page breaks and pagination. Uploaded PDFs keep their original pages; branding applies to surrounding emails and signing screens rather than rewriting those pages.
Choose branding for a new document
- Select Upload PDF or Create document in Documents.
- In Branding, keep the default or choose a named profile.
- Select Continue. The new document saves its own branding snapshot.
Choose branding for an agent
- Open Agents → Agent Types → Document Agents and edit the agent.
- Select This agent’s branding, then choose a profile in Branding or inherit the tenant default.
- Save the agent. New documents using Agent default inherit that selection; choosing a named profile overrides it for that new document.
Management links open another tab so in-progress edits stay in place. Returning refreshes the available profiles.
Set signing defaults
Open Signing policies on the branding page to configure default routing, invitation expiry, reminders and permitted automation. Reminders remain off until configured; manual reminders are still available. SMS verification requires a sender assigned to your workspace.
Keep automatic sending disabled until your team has tested its templates and policy. Automation does not bypass required signatures, recipient consent or locked sections.
Branding, template defaults or global sections?
| Setting | What it controls |
|---|---|
| Branding profiles | Logo, color, approved font, paper size and repeating header/footer |
| Template defaults | Tenant replacement values, such as reusable business details; tenant-admin access is required |
| Global sections | Reusable clauses or other document content, separate from visual branding |
Links to all three are available from document-related screens. Template defaults (sign-in required) and branding settings (sign-in required) can also be bookmarked.
If a change does not appear
- An existing draft still looks the same: its saved snapshot is preserved. Test the updated profile in a new document.
- An uploaded page has no new logo: its layout is preserved. Put the logo in the source PDF if it belongs on those pages.
- You cannot see the settings link: ask your administrator for the appropriate document-settings permission; Template defaults additionally requires tenant-admin access.